Logseq is a powerful open-source knowledge management tool that emphasizes bidirectional linking and block-level editing. Sharing your graph publicly can be a great way to showcase your knowledge or collaborate with others.
What You’ll Build/Achieve
You’ll publish your Logseq graph as a live website accessible to anyone on the internet using GitHub Pages and automated workflows.
Prerequisites
- GitHub account
- Logseq graph in a GitHub repository
- Basic familiarity with GitHub interface
1. Open Repository Settings
Navigate to your repository on GitHub and click the Settings tab at the top.

2. Configure GitHub Pages
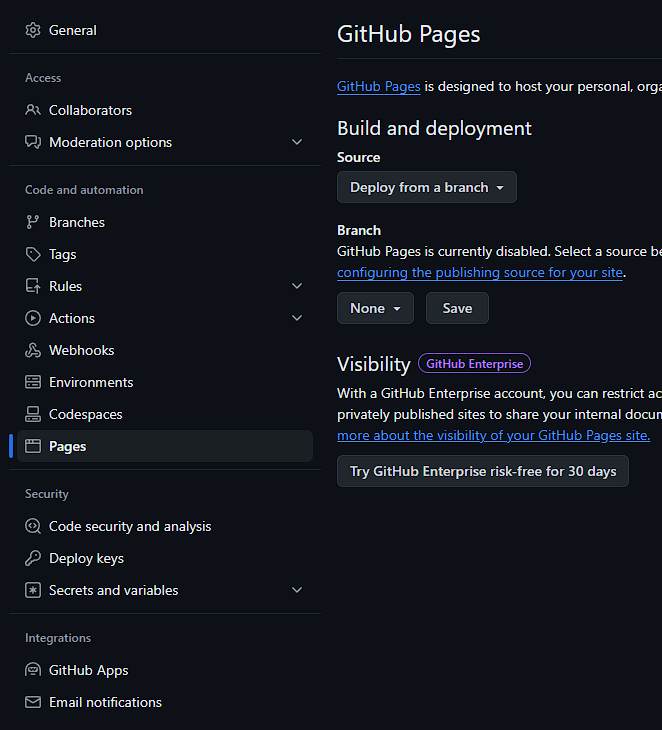
In the left sidebar, click Pages under the Code and automation section.
3. Set Build Source
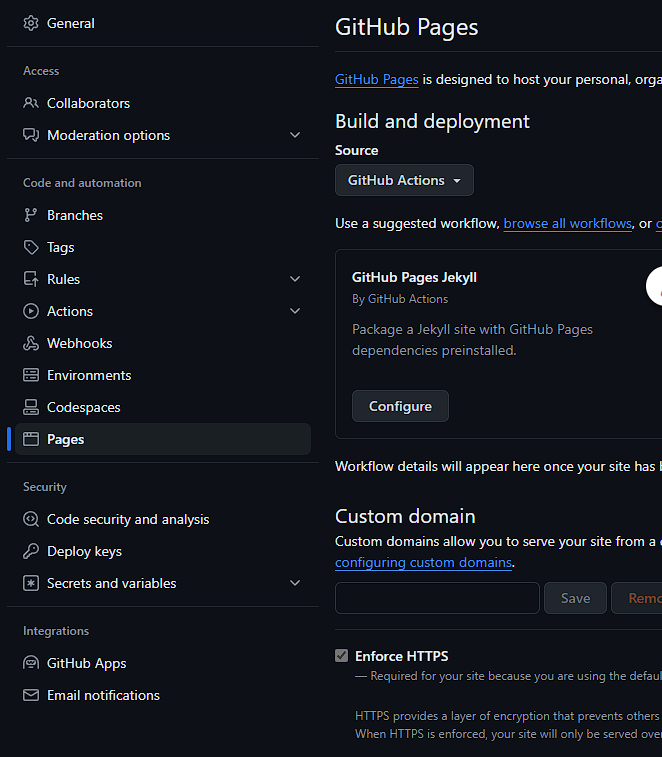
Under Build and deployment, change the Source from “Deploy from a branch” to “GitHub Actions”. This enables automated publishing whenever you update your graph.
4. Access GitHub Actions
Click the Actions tab at the top of your repository.

5. Run the Publishing Workflow
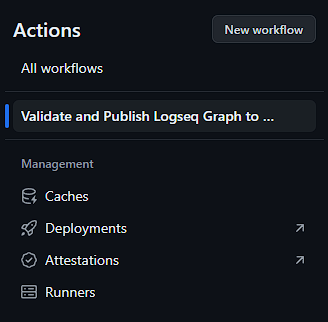
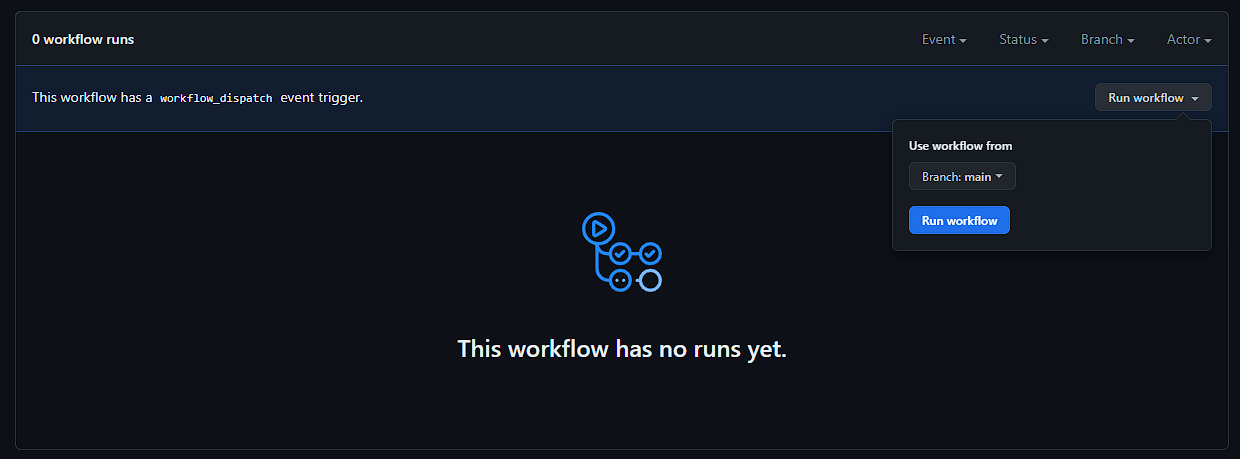
In the left sidebar, click your workflow (e.g., “Validate and Publish Logseq Graph to GitHub Pages”). Click Run workflow on the right, then click the blue Run workflow button.
6. Wait for Completion
The first run takes several minutes (10+ minutes) as it sets up the publishing environment. Subsequent runs will be much faster (1-2 minutes).
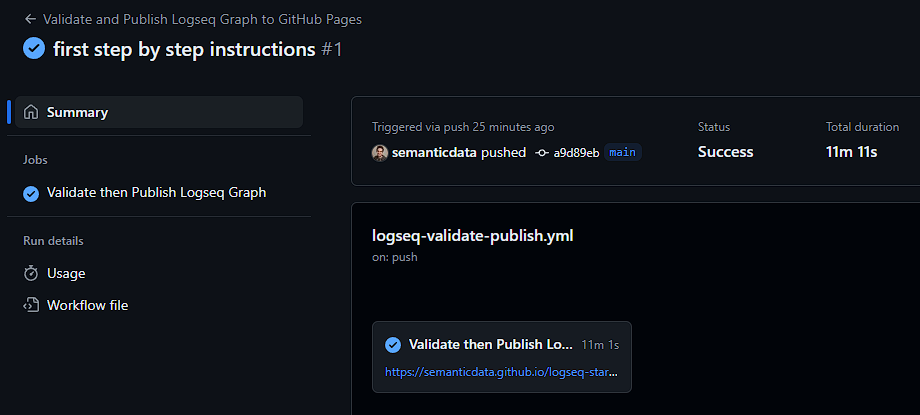
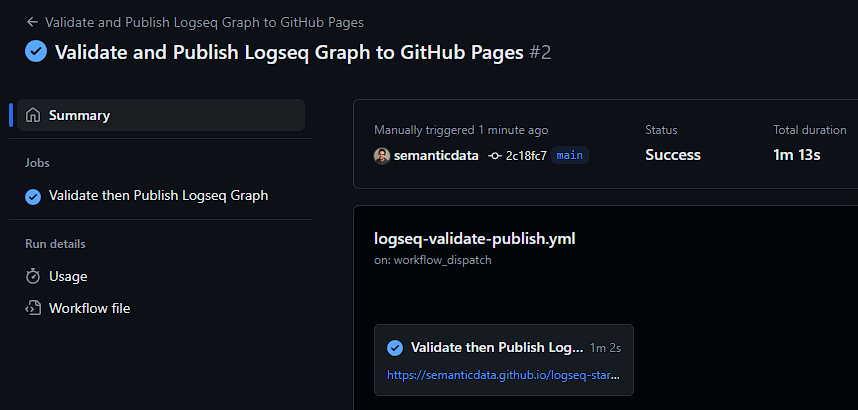
7. Set Repository Website URL
Return to your repository’s main page and click the ⚙ (gear) icon next to “About”. Under Website, click “Use your GitHub Pages website” to auto-populate your site URL.

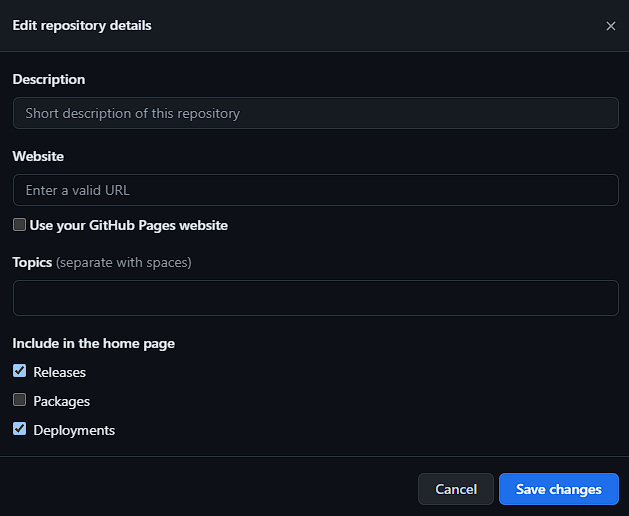
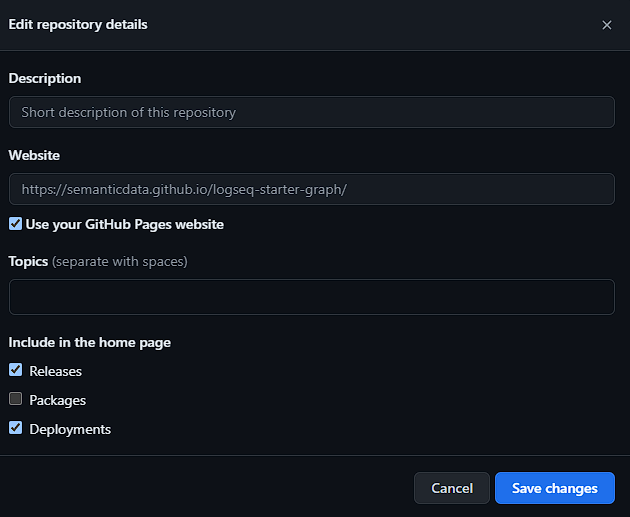
Note
This is a good time to add a description to your project if you haven’t already.
Verification
You’ll know it worked when you can visit your GitHub Pages URL (typically https://your-username.github.io/repository-name/) and see your published Logseq graph.

Common Issues
Problem: Workflow fails on first run
Solution: Check that your repository contains valid Logseq files and the workflow has proper permissions
Problem: Site shows 404 error
Solution: Wait a few more minutes after workflow completion - GitHub Pages can take time to propagate
Problem: Changes to graph don’t appear on website
Solution: Make sure to push your changes to GitHub and re-run the workflow